How To Insulate A Loft Conversion – Do It Right
If you’re thinking of converting your loft, then one of the things you will want to consider is how to insulate your loft conversion.
Insulating a loft is obviously an important aspect of the conversion process.
It not only ensures a comfortable living space but also contributes to energy efficiency, reducing heating bills, and decreasing carbon footprints.
I’m going to look at the various steps and considerations for insulating your loft conversion.
Table of Contents
Understanding Loft Insulation
Before you start on the insulation process, it’s very handy to understand the different types of insulation materials available and their suitability for your loft space.
The most common types are blanket insulation (such as fibreglass or mineral wool), loose-fill insulation, sheet insulation, and foam insulation.
Each has its advantages and suitability for different loft types.
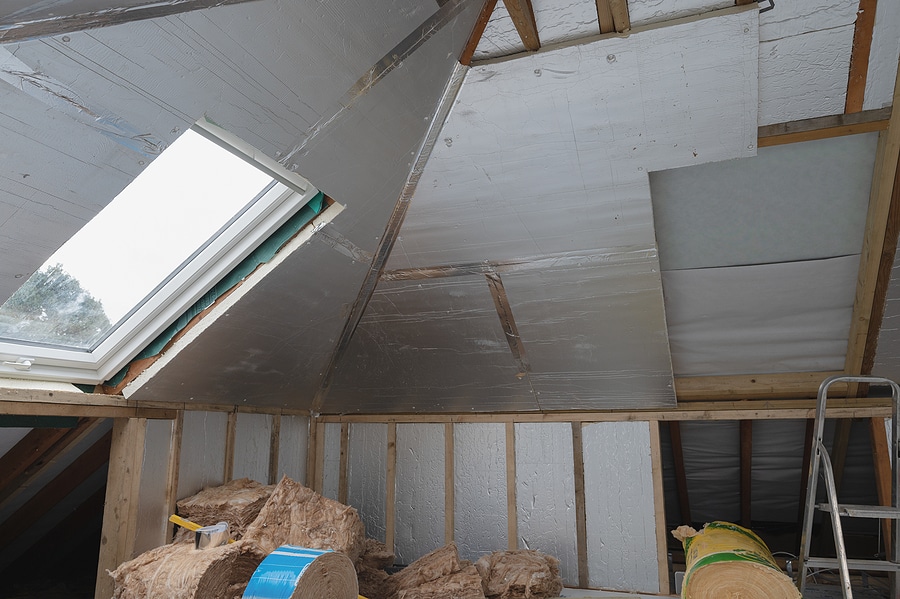
Sheet loft insulation comes in sheets and is generally used to insulate the sloping side of the interior loft roof. This type of insulation can often be more expensive and is energy intensive to manufacture, however has a high insulation value.
A newer form of insulation product is sheep’s wool which can be used for a range of insulating jobs, such as between roof beams, under floors and also in solid walls.
Sheep’s wool is a very effective insulator and provides an alternative to the more synthetic types of insulation.
Wool insulation can last decades and is also treated to protect against fire and also to be insect resistant.
Rigid foam is a form of insulation that can be utilized where weight is in need of support, like for example under a floor or in lofts.
As well as possessing suitable rigidity and durability, rigid foam also has the benefit of acoustic insulation – being able to minimize acoustics/sound through walls or raised floors.
How Thick Should Loft Insulation Be?
The recommended thickness for loft insulation varies, but generally should be around 270-300mm. This depends on the insulation material type.
Thicker insulation improves energy efficiency, reducing heat loss and energy bills. However, always consider the specific requirements of your property and local building regulations.
Planning and Regulations
Building Regulations
In the UK, loft conversions must meet specific building regulations (Part L – Conservation of fuel and power).
When considering how to Insulate a loft conversion, it’s important to ensure that your insulation meets the required U-values – a measure of how quickly heat transfers through a structure. For loft conversions, the target U-value is usually around 0.18 W/m²K.
Professional Assessment
It’s wise to have a local professional assess your loft space, in order to provide specific advice on the best insulation approach. If you want the best advice on how to insulate a loft conversion, you should definitely consider that physical inspection.
They can also ensure that your insulation meets fire safety standards and that there is adequate ventilation to prevent condensation.
Types of Loft Conversion Insulation
Cold Roof Insulation
This method involves insulating between and over the rafters, leaving the loft space unheated. It’s simpler and less expensive but is not ideal if you plan to use the loft as a living space.
Warm Roof Insulation
Warm roof insulation is applied above, between, or below the roof rafters, creating a habitable and warm loft area.
It’s a little more complex and can be more expensive, but it’s the preferred method for a conversion where the loft becomes an integral part of the living space.
There are lots of different types of insulation material available to use
How to insulate a loft conversion – step by step
Preparing the Loft Space
- Clear the Area: Ensure the loft is clear of belongings and old insulation materials that might not be up to standard.
- Ventilation: Check that there is adequate ventilation to prevent condensation. Installing roof vents may be necessary.
- Wiring and Pipework: Ensure all electrical wiring and pipework is safely rerouted or protected before insulation is installed.
Installing Insulation
- Between the Rafters: Start by placing insulation between the rafters. Cut the insulation material to fit snugly between them.
- Over the Rafters: If you’re using blanket insulation, lay it over the rafters for additional thermal protection.
- Under the Rafters: In a warm roof setup, insulation can also be placed under the rafters for a seamless finish. This often involves a plasterboard finish that will be skimmed and painted.
- Room-in-Roof: For a room-in-roof insulation, insulation boards are often fitted between roof rafters, with additional insulation placed over the rafters.
Finishing Touches
- Insulating Doors and Windows: Don’t forget to insulate around any loft doors or windows to prevent drafts.
- Dry Lining: Apply plasterboard over the insulation, ready for plastering and painting.
- Access Points: Ensure that access points, such as loft hatches, are also insulated and sealed.
Aftercare and Maintenance
Once the insulation is installed, it’s vital to maintain it properly. Check regularly for any signs of damp or condensation and ensure that any roof leaks are fixed promptly to prevent insulation damage.
Professional Help vs DIY
While some aspects of loft insulation can be a DIY project, professional help is often advisable. Not only will professionals ensure that the insulation is installed correctly and compliant with UK building regulations, but they can also provide a warranty for their work.
Understanding how to insulate a loft conversion is inevitably a big part of your planning. Insulating a loft conversion is an investment in your home’s comfort and energy efficiency.
By following the steps outlined and ensuring compliance with UK building regulations, you can create a cozy, warm, and energy-efficient space in your home.
Whether you decide to tackle the project yourself or hire professionals, proper loft insulation is a smart and sustainable choice for any homeowner.